Monday, August 20, 2007

Yin Yang Cookies


I made these cookies for Scot's Aikido seminar. Here is the meaning of this symbol and of Aikido.

yin and yang
=

(Chinese philosophy) the two fundamental principles, one negative, dark, passive, cold, wet, and feminine (yin) and the other (yang) positive, bright, active, dry, hot and masculine. The interactions and balance of these forces in people and nature influence their behavior and fate.

Aikido
, is a Japanese martial art developed by Morihei Ueshiba as a synthesis of his martial studies, philosophy, and religious beliefs. Aikido is often translated as "the Way of unifying (with) life energy" [1] or as "the Way of harmonious spirit." [2] Ueshiba's goal was to create an art practitioners could use to defend themselves without injuring their attacker.

Aikido emphasizes joining with an attack and redirecting the attacker's energy, as opposed to meeting force with force, and consists primarily of body throws and joint-locking techniques. In addition to physical fitness and technique, mental training, controlled relaxation, and development of "life energy" or "spirit" (ki) are emphasized in aikido training.

Thursday, August 16, 2007

Baileys and Macadamia Semifreddo


This is a very rich and super delicious Ice Cream like Dessert. I found the recipe in a little Ice Cream book That I have. The book reccomends serving a shot of expresso on the side to counterbalance the sweetness, or a shot of Baileys.
I want to try this in a mold as described below.

Wondering what Semifreddo is?

The Culinary meaning of Semifreddo:
"Semifreddo" means "half cold" in Italian. It can be any partially frozen dessert, from cake to ice cream, fruit or custard. Semifreddo has air incorporated into it by means of whipped eggs, meringue, or whipped cream. It has the texture of a mousse that is frozen. Semifreddo does not freeze solid and does not require the freezing power of an ice cream machine. All it needs is an overnight stay in a mold in the freezer. Although many semifreddo recipes use a loaf pan as the mold, you can make semifreddo in any shape mold that you wish. Lining the mold with waxed paper, plastic wrap, etc. before pouring in the batter will help the semifreddo to release more easily from the mold once frozen. If you are using a flexible silicone mold, this step is not necessary. You can also unmold by dipping the mold briefly in hot water or loosening the sides with a knife. Semifreddo is wonderful served with your favorite fresh fruit alongside.

Bailey's and Macadamia Semifreddo

Makes 2-1/2 cups

6 egg yolks

1/2 cup extra-fine sugar

1/2 cup Bailey's Irish Cream liqueur

1-1/4 cups heavy cream

1 cup macadamia nuts, chopped

Place the yolks and sugar in a bowl over a saucepan of simmering water.
Whisk until pale and creamy.
Slowly add the Bailey's and beat until well combined and thick.
Remove the bowl from heat and continue beating until cool.
In a separate bowl, whip the cream to stiff peaks.
Fold the cream and nuts into the cooled Bailey's mixture.
Transfer to a freezer container, cover the surface directly with wax paper or foil, and freeze.
After 1 hour of freezing, stir the mixture gently.
This will prevent the nuts from sinking to the bottom.
Cover again and freeze until serving.

Variation: try this with walnuts, or any other nut.

Today, Another Year of School Begins

Wednesday, August 15, 2007


"There is no power on earth that can neutralize the influence of a high, pure, simple, and useful life."


-Booker T. Washington (1856-1915)
-Educator and writer

Tuesday, August 14, 2007

Baking: Semolina Bread


This Bread recipe comes from the Silver Palate Cook Book. I was inspired to make this bread so that we could make our favorite summertime sandwich:
BBT's =Bacon, Basil,& Tomato
Every Summer we make these sandwiches a few times. Note: Store bought bread works too

2 cups lukewarm water

1 pkg active dry yeast

3 Cups semolina flour

1 T salt

2 to 3 Cups bread flour or unbleached all-purpose flour

2 Tablespoons olive oil

3 to 4 tablespoons cornmeal

1 egg

Sesame Seeds (optional)

1. Pour the water into a mixing bowl, stir in the yeast, and let stand for 10 minutes. Stir again to be certain all the yeast is dissolved.

2. Add the semolina flour and salt and stir well.

3. Add 2 cups of the bread flour and stir to make a sticky dough. Turn the dough out onto a floured work surface and let rest while you wash and dry the bowl.

4. Begin kneading the dough, sprinkling it with the remaining cup of bread flour as necessary to keep it from sticking to your hands. After about 10 minutes the dough will be smooth and elastic and will have absorbed more or less the last cup of flour.

5. Shape the dough into a ball and place in the bowl. Pour the olive oil over the dough and turn it several times to coat with the oil. Cover the bowl with a towel and set aside until the dough has tripled in bulk. ( the increase in volume is more important than the time it takes; depending on room temperature this may be 2 or more hours. Do not try to force the dough to rise more rapidly by setting it on radiators, etc. This can sour the bread. patience is a virtue.)

6. Punch down the dough, turn it out onto a lightly floured work surface, knead briefly ( 5 minutes or less ), and return it to the bowl. Cover and let rise again until doubled.

7. Punch down the dough, cut it into thirds, and shape each third into a thin loaf about 24 inches long. Sprinkle a baking sheet with 3 to 4 tablespoons cornmeal and arrange the loaves on the sheet, leaving as much room between the loaves as possible. Cover and let rise until not quite doubled, about 30 minutes.

8. Preheat the oven to 425 F

9. Beat together the egg and the 1 Tablespoon water. When the loaves have risen, brush them well with this egg wash. Sprinkle the sesame seeds to taste, and slash the loaves decoratively on top with a sharp knife, making diagonal cuts.

10. Slide the baking sheet onto the center rack of the oven and reduce the heat to 375 degrees F. Bake until the loaves are brown and sound hollow when the bottoms are thumped, 30 to 40 minutes. (For a crisper bottom crust, remove the loaves from the baking sheet and place them directly on the oven rack for the last 5 to 10 minutes of baking time.)

11. Remove the loaves from the oven and cool on a rack. wrap when cool.

Makes 3 Loaves, about 18 inches long


One thing I like about the Silver Palate Cook Book is the Quotations that are found throughout the pages. Next to this bread recipe is this quote:

"Bread deals with living things, giving life, with growth, with the seed, the grain that nurtures. It is not coincidence that we say bread is the staff of life"
-LIONEL POILANE

Growing; Heirloom Tomatoes


We have just started to pick tomatoes from our Garden. Quinn could not wait any longer, he has been checking their progress each day. We always have to wait until late in the season before we see ripe tomatoes. Our garden is quite shady and the Tomoatoes were all started from seed. It is amazing to see how fast they grow from tiny seedlings. Next year we will need larger cages- as the tomato plants have escaped and are growing on top of one another. Varieties ready for picking so far are: Brandy Wine, Splash of Cream, Currant, and E.M Banana Paste.

Photo Tips


*ALWAYS have your camera strap around your arm

*Get close, but not too close for your camera

*Only use photos that are sharp and in focus

*Have a simple background and foreground

*Don't center your subject-have off center.

*Rule of 1/3rds- keep subject 1/3 from an edge

*Don't let horizon cut your photo in 1/2.

*The viewer's eye should go to and stay on subject.

*Take both verticals and horizontals.

*Have animals only, no people, in animal photos.

*Have people only, no animals, in people photos.

*Lock your elbows against your body to hold still.

*Take both color and black and white.

*Crop (cut) your photos to improve the.

*Don't have things merging off the edge of the photo.

*Leading line leads your eye into and across photo.

*patterns are the same thing repeated.

*Texture photos show the textures.

*Formal portraits should show both eyes of subject.

*Show two sides and a corner of a building.
These Tips are from 4-H.

Photo Tips from Kodak:

1. Look your subject in the eye
2. Use a plain background
3. Use flash outdoors
4. Move in close
5. Move it from the middle
6. Lock the focus
7. Know your flash's range
8. Watch the light
9. Take some vertical pictures
10. Be a picture director

Growing: Zinnia Envy


I was excited to try this unusual type of Zinnia this summer. I stared the seed early this spring. Zinnia 'Envy' is just starting to bloom in my garden while the other types have been blooming strong for a while now. The Zinnia Envy, 'Zinnia elegans', is unusual as it adds a chartreuse color to the garden. Seeds were a bit more expensive for this variety than the other Zinnia varieties. The seed packet claims 'Envy' to have a long blooming season, displaying large 3 to 4 inch flowers Tthat will continue to bloom from early summer through fall until first frost.
So far the Flowers that have bloomed have been smaller than that, hopefully as they continue to bloom they will only get better looking- making all the other Zinnia varieties growing next to them Green with Envy.


Here is a great post about Zinnia Green Envy from Mr Brown Thumb.

Mr Brown Thumb: Zinnia Green Envy

Cooking: CHICKEN and POTATO CHOWDER

We all loved this quick and easy soup for dinner.

Makes 7 cups, serves 4 to 6

2 boneless skinless chicken breasts, cut into cubes
salt and pepper
2 Tablespoons olive oil
1 medium onion, coarsely chopped
2 garlic cloves, minced
2 Tablespoons all-purpose flour
2 1/2 cups homemade or low-sodium store-bought chicken stock
1/2 pound red potatoes, cut into 1/2 inch cubes
2 1/2 cups whole milk
pinch of ground nutmeg
3/4 cup frozen corn kernels, thawed
3/4 cup frozen peas, thawed

1. Season chicken with salt and pepper. Heat 1 Tablespoon oil in a medium saucepan over medium-high heat. Add Chicken; cook until golden brown, 2 to 3 minutes. Transfer to a bowl.
2. Add remaining Tablespoon oil to same pan over medium-low heat. Add onion and garlic; season with salt. Cook, stirring often, 5 minutes. Sprinkle in flour; cook, stirring, 1 minute. Slowly stir in stock until incorporated; add potatoes. Bring to a boil; reduce heat. Simmer until potatoes are tender, 10 to 12 minutes.
3. Stir in milk and nutmeg. Simmer, stirring occasionally, until thick, 3 to 5 minutes. Add reserved chicken, corn, and peas; simmer until chicken is cooked through, 5 to 7 minutes. Season with salt and pepper. Serve immediately.

From Martha Stewart

Sunday, August 12, 2007

Datura: Angel Trumpet of Death


I grew this plant from seed this spring. I have been waiting to see a bloom; I missed the first few since it is a night blooming plant. Here is some information on this interesting but dangerous plant. I found the information below from a cool gardening site:
This Garden is illegal

"The Angel of Death is a character that exists, in concept, in almost all religions. I tend to consider my garden my religion, with a first hand relationship with god and nature. So then it is no wonder that in my garden there is also an Angel of Death.

Like most angels, the Datura is a beautiful specimen. It has a glorious trumpet shaped flower that opens at dusk and releases a wonderful scent for all to enjoy. It is no surprise that datura’s also carry the common name of Angel’s Trumpet.

But Datura’s, for all their beauty and elegance, are one of the more deadly plants you can have in your yard. Thomas Jefferson, an avid gardener, would not allow the flower to be grown in his garden, for fear that it would kill one of his grandchildren.

Datura is one of the more dangerous members of the belladonna family (which is kind of like saying that Squeaky Fromme was one of the more dangerous members of the Manson Family). They contain a devastating cocktail of strychnine, hyoscine, hyoscyamine and atropine. Daturas are so lethal that they have been used throughout history and literature as a means of killing a person or committing suicide. Supposedly, it was even used as an execution drug for criminals.

And yet, oddly enough, it also served a pharmaceutical purpose as an ancient Viagra.

But before anybody go running out to find this organic alternative treatment for erectile dysfunction (as if the whole death thing were not enough to deter), it may be that the men who were treated with this for male problems did not in fact have sex after using it. But rather imagined it.

Datura is a potent hallucinogenic. Not only has it been used to kill people, it has also been used by more than a few cultures for spiritual enlightenment or a cheap high.

Like many toxic plants, Daturas are useful as medicinal herbs but dangerously so in that the concentrations of the useful toxins vary drastically from plant to plant. What may be a proper dosage from one plant could be a lethal dosage from another. Therefore, common sense would tell you that perhaps you should find another plant to cure what ails you.

Yes, I have children and, yes, I have datura in my yard. I just figure that realistically a good half of the plants in my yard are lethal if ingested in the right (sometimes small) quantities. My children have learned that you should never eat a plant unless an adult (preferably their garden savvy mother) tells them it is okay. Let’s hope this lesson carries through to when they are teenagers looking for a cheap high."

Friday, August 10, 2007

Chocolate Zucchini Cake

A great way to use an abundance of Zucchini. This great recipe comes from Simply Recipes.


2 1/2 cups regular all-purpose flour, unsifted
1/2 cup cocoa
2 1/2 teaspoons baking powder
1 1/2 teaspoons baking soda
1 teaspoon salt
1 teaspoon cinnamon
3/4 cup soft butter
2 cups sugar
3 eggs
2 teaspoons vanilla
2 teaspoons grated orange peel
2 cups coarsely shredded zucchini
1/2 cup milk
1 cup chopped walnuts or pecans
Glaze (directions follow)

Preheat the oven to 350°F.
1 Combine the four, cocoa, baking powder, soda, salt, and cinnamon; set aside.
2 With a mixer, beat together the butter and the sugar until they are smoothly blended. Add the eggs to the butter and sugar mixture one at a time, beating well after each addition. With a spoon, stir in the vanilla, orange peel, and zucchini.
3 Alternately stir the dry ingredients and the milk into the zucchini mixture, including the nuts with the last addition.
4 Pour the batter into a greased and flour-dusted 10-inch tube pan or bundt pan. Bake in the oven for about 50 minutes (test at 45 minutes!) or until a wooden pick inserted in the center comes out clean. Cool in pan 15 minutes; turn out on wire rack to cool thoroughly.
5 Drizzle glaze over cake.
Glaze: Mix together 2 cups powdered sugar, 3 Tablespoons milk, and 1 teaspoon vanilla. Beat until smooth.

Cut in thin slices to serve. Makes 10-12 servings.

Wednesday, August 08, 2007

Cade Baking: Mystery Muffins


Cade has been enjoying to bake a few things all by himself. He has been using a 4-H pamphlet called Six Easy Bites. Next his is going to try a cookie recipe from the book. I like how it gives instruction to clean up the pans after baking. The information/instuctions allows for learning and experimenting.


You Need:

1 egg

1/2½ cup milk

1/4 cups vegetable oil

1 1/2 cups flour

½1/2 cup sugar

2 teasp. Baking powder

1/2 teasp. Salt

Your favorite jam or jelly

1. Heat oven to 400 degrees F. Grease the bottoms of six muffin cups in a 12-cup pan.

2. In a large bowl, mix together the “dry” ingredients: the flour, sugar, baking powder, and salt.

3. In a medium bowl, mix together the “wet” ingredients: the egg., milk, and vegetable oil. Set aside.

4. Make a well with the dry ingredients by pushing them up the sides of the bowl.

5. Pour the “wet” ingredients into the “dry” well all at once. Stir just until the dry ingredients are wet (about 24 strokes) Don’t over mix. The batter is supposed to be lumpy.

6. Fill the six prepared muffin cups ½ full. Drop 1 tsp. of jam or jelly into the center of each muffin. Add more batter to fill muffin cups 2/3 full.

7. Fill the empty muffin cups with water to make sure the pan is evenly heated.

8. Bake 20-25 minutes or until golden brown. Carefully remove the muffins from the pan as soon as you take them out of the oven, so they won’t get soggy. Cool muffins on a wire rack.

9. Let the pan cool down. Then wash, rinse, and dry the muffin pan.

A Favorite Garden Visitor

Monday, August 06, 2007

Lessons in Photography


Cade has been working on 4-H projects the past few days. -Nothing like waiting to the last minute. We spent an afternoon together trying to get some good photos from our backyard. It took great patience!! However it was kind of fun also. Could not have been done without a digital camera. These are a few photos that he took.

Friday, August 03, 2007

My Favorite Chocolate Pudding made by Quinn


A perfectly simple recipe for Chocolate Pudding from Luscious Chocolate Desserts Cook Book. Quinn did all the careful stirring and mixing for this chocolate Pudding. It turned out very good and very rich and full of chocolate.


1/2 cup packed dark brown sugar

2 T granulated sugar

1/4 cup unsweetened cocoa powder

2 T cornstarch

1/4 tsp salt

2 cups Whole Milk - we used skim and it turned out fine

4 ounces bittersweet or semisweet chocolate chopped

1 tsp pure vanilla extract

Stir together the brown sugar, granulated sugar, cocoa, cornstarch, and salt with a fork in a large heavy saucepan until the brown sugar is broken up and the mixture is well blended. Add 1 cup of the milk and the chocolate and heat over medium heat, whisking, until the chocolate is melted and the mixture is smooth.

Whisk in the remaining cup of milk and cook, whisking frequently, for 6 to 8 minutes, until large bubbles pop on the surface and the pudding is thick and smooth. remove the pan from the heat and whisk in the vanilla, them immediately transfer the pudding to a large bowl or 4 serving bowls or stemmed glasses.

Serve the pudding hot, warm, at room temperature, or chilled. If not serving immediately, whisk occasionally to keep a skin from forming as it cools.

Wednesday, August 01, 2007

Cooking: Summer Chicken


Here is another Great recipe from the Silver Palate Cook Book. I will be making this again. The Mustard and Basil made an interesting combination in the sauce.

1 roasting chicken (3 1/2 pounds)
1 bunch of fresh basil, washed carefully
51/2 cups chicken stock or canned chicken broth
1 cup coarsely chopped yellow onions
2 carrots, peeled and chopped
5 parsley sprigs
salt and pepper to taste
4 small white onions
4 new potatoes, scrubbed
4 medium sized carrots, peeled and cut inot 2 inch lengths
3/4 pounds fresh green beans, cleaned and tipped
6 Tablespoons unsalted butter
3 Tablespoons all-purpose flour
1/3 cup creme Frache or heavy cream
2 Tablespoons chopped fresh Italian parsley

1. Wash the chicken, pull off all the fat that can be removed, stuff the cavity with the basil, and truss. Set the chicken, breast side up, in a heavy saucepan just large enough to hold it comfortably. Pour in the chicken stock and bring to a moderate boil. Reduce the heat to a gentle simmer and skim any accumulated fat or scum.

2. Add the chopped onion, chopped carrots, and parsley sprigs and season lightly with salt and pepper. Partially cover, reduce heat, and cook at a gentle simmer until the chicken juices run a clear yellow when the thigh is pricked with a fork., 40 minutes.

3. Meanwhile bring a large pot of salted water to a boil and drop in the white onions. Simmer for 10 seconds, lift out with a slotted spoon, and drop into a large bowl of ice water. Next, add the potatoes and cook until tender but crisp, and then with the green beans. Reserve all the vegetables in the ice water.

4. When the chicken is done, remove it from its broth with a slotted spoon, cover and keep warm.

5. Measure out 2 cups of the chicken stock and bring it to a boil in a smaller saucepan. In another small pan melt 2 Tablespoons of butter over medium heat. When the butter is foaming, sprinkle in the flour, Cook without browning, stirring constantly. for about 5 minutes. Remove from heat and pour in the boiling chicken broth all at once. The sauce will bubble furiously for a minute. Whisk the sauce as it bubbles and subsides and then return it to low heat. Bring the sauce up to a boil, stirring constantly, and cook for 5 minutes.

6. Remove the basil from the chicken's cavity and chop it fine. Whisk in the basil, mustard, and creme frache or whipping cream into the sauce, remove the sauce from heat, cover, and keep warm.

7. Melt the remaining butter ( 4 Tablespoons ) in a skillet over low heat. Drain the blanched vegetables and warm them generously in the butter until hot through, no more than 5 minutes. Season lightly with salt and pepper. Sprinkle with the chopped parsley.

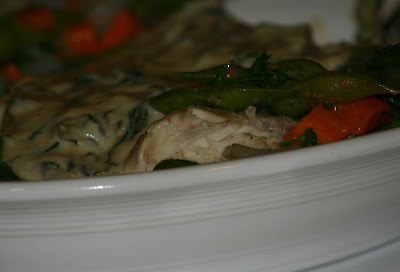
8. Carve the chicken into serving pieces and arrange on a platter. Surround the chicken with the warmed vegetables, spoon some of the sauce over the chicken, and offer the remaining sauce on the side. serve immediately.

4 portions

You May also like

Related Posts with Thumbnails