I love love this quilt! It is all hand-stitched and filled with 1940s vintage feedsack yo yos. I found this Queen size quilt this morning. It is in Great condition and full of so many colorful vintage fabrics. Some of the fabrics in the quilt are Feedsack prints- so nostalgic and beautiful floral pastels. i also love the sunny yellow pattern.
There are hundreds of yo yos in this quilt- I can not imagine the countless hours of handiwork that were put into the stitching of this.
I placed it on top of a red bedspread before I took a picture.
Tuesday, May 28, 2013
Monday, May 20, 2013
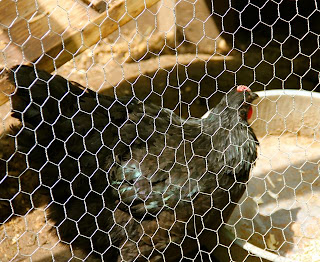
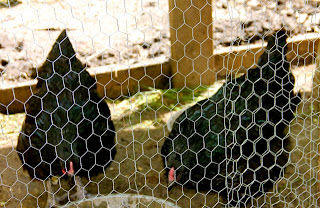
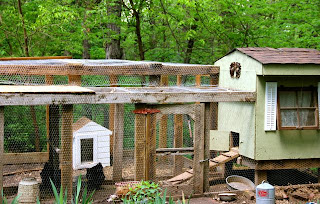
Quinn and his Chickens
We just added a few new additions to our flock: Two beautiful black Australorp hens and a mix of three Bantam breeds.
Wednesday, May 15, 2013
Wrapping up the last few Etsy Orders
I love this time of year but it is also such a busy time!!! It so beautiful outside that it is difficult to focus on indoor jobs.
Ivory and Pink Tags for a Baptism and 1st Birthday.
Ivory and Pink Tags for a Baptism and 1st Birthday.
Monday, May 13, 2013
Baking: Red Velvet Cheesecake
CHEESECAKE:
Two (8-ounce) packages cream cheese, at room temperature
2/3 cup granulated white sugar
pinch of salt
2 large eggs
1/3 cup sour cream
1/3 cup heavy whipping cream
1 teaspoon vanilla extract
Two (8-ounce) packages cream cheese, at room temperature
2/3 cup granulated white sugar
pinch of salt
2 large eggs
1/3 cup sour cream
1/3 cup heavy whipping cream
1 teaspoon vanilla extract
RED VELVET CAKE:
2 1/2 cups all purpose flour
1 1/2 cups granulated white sugar
3 tablespoons unsweetened cocoa powder (not Dutch process)
1 1/2 teaspoons baking soda
1 teaspoon salt
2 large eggs, at room temperature
1 1/2 cups vegetable or canola oil
1 cup buttermilk
1/4 cup (two 1-ounce bottles) red food coloring
2 teaspoons vanilla extract
2 teaspoons white vinegar
CREAM CHEESE FROSTING:
2 1/2 cups powdered sugar, sifted lightly to remove any lumps
Two (8-ounce) packages cream cheese, at room temperature
1/2 cup unsalted butter, at room temperature
1 tablespoon vanilla extract
2 1/2 cups powdered sugar, sifted lightly to remove any lumps
Two (8-ounce) packages cream cheese, at room temperature
1/2 cup unsalted butter, at room temperature
1 tablespoon vanilla extract
Directions
1. Prepare the cheesecake layer: Preheat oven to 325 degrees F. Place a large roasting pan on the lower third rack of the oven. Place a kettle of water on the stove to boil. Spray a 9-inch springform pan with nonstick spray and line the bottom with a round of parchment paper. Wrap a double layer of foil around the bottom and up the sides of the pan (you want to seal it so the water from the water bath doesn’t seep into the pan). In a large bowl, use an electric mixer to mix the cream cheese- blend until it is nice and smooth and creamy. Mix in sugar and salt and blend for 2 minutes, scraping down sides of the bowl as needed. Add eggs, one at a time, blending after each addition. Finally, mix in sour cream, whipping cream and vanilla. Mix until smooth. Pour the batter into the prepared pan. Set the pan into the roasting pan in the pre-heated oven. Carefully pour the hot water from your kettle into the roasting pan (it will fill the pan surrounding the cheesecake). Pour enough water so that there is about an inch of water coming up the foil along the sides of the cheesecake pan. Bake the cheesecake for 45 minutes. It should be set to the touch and not jiggly. Remove the cheesecake from the roasting pan and let it cool on a wire rack for at least an hour. When it has cooled, place the pan into the freezer and let the cheesecake freeze completely. This can be done in several hours- or overnight.
2. Prepare the cake layers: Preheat oven to 350 degrees F. Grease and flour two 9-inch round metal baking pans (or spray with nonstick baking spray with flour). In a large bowl, whisk together flour, sugar, cocoa powder, baking soda and salt. Add eggs, oil, buttermilk, food coloring, vanilla and vinegar to the flour mixture. Using an electric mixer on medium-low speed, beat for 1 minute, until blended. Scrape sides and bottom of bowl with a rubber spatula. Beat on high speed for 2 minutes. Spread the batter evenly into the prepared pans, dividing equally. Bake 30 to 35 minutes or until a toothpick inserted in the center comes out with a few moist crumbs attached. Let cool in pans on a wire rack for 10 minutes. Run a knife around the edge of the pans, then invert cakes onto a rack to cool completely.
3. Prepare the frosting: In a large bowl, using an electric mixer on medium-high speed, beat powdered sugar, cream cheese, butter and vanilla until it is smooth and creamy (do not overbeat).
4. Assemble the cake: Place one cake layer into the center of a cake plate or platter. Remove the cheesecake from the freezer, take off the sides of the pan, and slide a knife under the parchment to remove the cheesecake from the pan. Peel off the parchment. Measure your cheesecake layer against the cake layers. If the cheesecake layer turns out to be a slightly larger round than your cake, move it to a cutting board and gently shave off some of the exterior of the cheesecake to get it to the same size as your cake layers. Place the cheesecake layer on top of the first cake layer. Place the 2nd cake layer on top of the cheesecake.
5. Frost the cake: Apply a crumb coat layer to the cake- use a long, thin spatula to cover the cake completely with a thin and even layer of frosting. Be sure to wipe off your spatula each time you are about to dip it back into the bowl to get more frosting (this way you won’t be transferring any red crumbs into the bowl of frosting). Don’t worry at this point about the crumbs being visible in the frosting on the cake. When your cake has a thin layer of frosting all over it, place it into the refrigerator for 30 minutes to “set” the frosting. Once the first layer of frosting is set, apply the 2nd layer. Start by adding a large scoop of frosting onto the top of the cake. Use a long, thin spatula to spread the frosting evenly across the top and then spread it down the sides of the cake too. Because you applied a crumb-coat layer, you shouldn’t have any red crumbs floating around in the final frosting layer. Decorate, as desired. I recommend white chocolate shavings ). Keep this cake refrigerated.
Saturday, May 11, 2013
Thursday, May 09, 2013
Wednesday, May 08, 2013
Tuesday, May 07, 2013
Indigo Bunting
I took a lunch break to enjoy some of this Beautiful Day outdoors. This Indigo bunting was visiting the pond this afternoon
Saturday, May 04, 2013
Wednesday, May 01, 2013
Spicy Roasted Tomato Soup
Well It is May Day today but it is 33degrees and Rainy with possible Snow tonight so Soup Sounded Good! I loved the method of roasting all the vegetables in the oven- makes it so easy!
ingredients:
5 large tomatoes, cut into 3/4" slices1 onion, cut into 1/2" slices1/2 jalapeno, cut in half lengthwise, seeded2 bell peppers, seeded, cut into 4 piecesolive oil1/4 teaspoon smoked paprika 1/2 teaspoon garlic powder3/4 teaspoon salt (or to taste)freshly ground black pepper2 cups vegetable broth1/4 cup grated parmesan cheese (plus additional cheese for garnishing)- I used sharp Cheddarfew tablespoons of heavy cream or creme fraiche (optional)directions:
1. Preheat oven to 375F. Arrange all vegetables on baking sheet. Drizzle olive oil all over. Roast for 20 minutes.For immersion blender:
Roughly chop all vegetables. Add all vegetables, smoked paprika, garlic powder, salt, pepper, vegetable broth and grated cheese to pot large enough so that when you use your immersion blender, it doesn't splatter all over the place. Blend in pot until you get a nice puree. Bring to simmer, taste and adjust seasoning.For Vitamix or Blendtec:
Add all ingredients to blender and set on your "Soup" setting. Taste and adjust seasoning.For standard blender:
Add all ingredients to blender, blend until smooth puree. Taste and adjust seasoning. Pour into pot and heat to serve.Garnish with additional parmesan cheese, a turn of the pepper mill and serve with crusty bread.
Roasted Baby Artichokes
Ingredients
9 baby artichokes (about 2 pounds)
2 lemons, cut in half
1/4 cup extra-virgin olive oil
2 to 3 tablespoons good-quality balsamic vinegar
2 teaspoons kosher salt
1/4 teaspoon freshly cracked black pepper
2 cloves garlic, peeled and minced
1/4 cup grated Parmigiano-Reggiano
1 tablespoon chopped flat-leaf parsley, for garnish
Directions
Preheat the oven to 400 degrees F.
Prepare artichokes. Remove the tough outer leaves of the artichokes and trim the stems. Use a vegetable peeler to remove the tough outer green layer from the stem. Cut off the top third of the head to remove the tough ends of the leaves, then split it down the middle. Rub with lemon as you work so they don't turn brown.
Mix together the olive oil, balsamic vinegar, salt, pepper and garlic. Lay the artichoke halves cut-side up in a roasting dish and drizzle with the olive oil mixture. Roast in the oven until the artichokes are tender, about 20 minutes.
To serve, top with the cheese and garnish with the parsley.
Read more at: http://www.foodnetwork.com/recipes/guy-fieri/grilled-baby-artichokes-recipe/index.html?oc=linkback
Subscribe to:
Posts (Atom)


